Sunday, October 30, 2011

Mom's Survival Pack

Mom's Survival Pack
I've decided that every new mom needs an amazing survival Gift Pack. And I've decided that I am going to make a new mom survival pack and give them to each and every new mom that I know.
This is not your feel good, snuggly kind of gift pack you give a mom. You know the kind....Slippers and bubbles and all that stuff that people think a new mom needs so she can "pamper" herself.
HA! Pamper yourself? Seriously? We need to give moms a real survival pack. A pack that when REAL life hits her she will fully appreciate the gift.
And here is what I think we should include:
Ear Plugs: Because let's face it.....Ear Plugs can and will be your best friend. You can use them for not only your children but your husband too. You will need them for everyday life. For the car....For the house.....For when you need to take a bath....Or just gather your thoughts. Trust me......Silence will never be experienced in a non artifical way again. So, just face it and put your ear plugs in.
Sunglasses.... WITH BLINDERS. Believe me you will need blinders. The Blinders will help in ignoring everything around you. Trust me you will need them. There will be lots of days that you can't take it anymore and pretending that it just doesn't exsist will be your best bet.
Blinders will help.
OK....Obvious I'm sure, but Tylenol....You will need it. You will need it for your body pains, your head pains, and your everyday life pains.
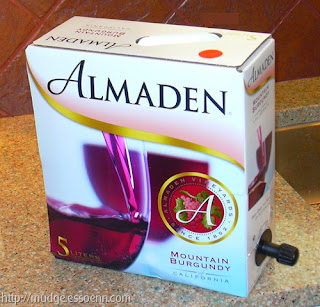
Boxed Wine....You gotta have it. Learn to love it (If you don't already) and keep it in the fridge. Drink it and Drink it and then Drink it some more. Use a sippy cup if you must but drink it.
Door Locks.....Get them and USE THEM. They will work well for locking the houdlems out of the bathroom, the bedrooms, wherever you don't want them. Baby Gates don't work great....they can escape from them. Tear them down or climb them. So, just get door locks and just lock them out.
OK....Let's just be real here. You're not going to make it without Xanax. At some point in motherhood you are going to need them. So, just get real now. See your Doctor (Since I can't legally supply the Xanax. lol) And get yourself a nice supply of them.
Otherwise I may throw in some things like Ambian and Nyquil. (For the mom) Some Benadryl (Trust me all you NEW moms you'll know why we use that soon) and maybe some duct tape. Cause when all else fails duct tape fixes everything. You can use it for all kinds of things. ;) *taping mouths, taping hands, taping kids to walls*

Pumpkin and Bat Gourds

Pumpkin and Bat Gourds
Something fun to do with the kids around here for halloween is to paint the gourds and make fun stuff with them. I'm not big into carving pumpkins and this is a great alternative.
Here are two examples of some fun things to make.
The Bat: The Bat is made of a little pumpkin. Painted black except for the eyes (Now we did have to help the eyes out a bit because Brother Baer was painting and he is 6. So we used a marker to straighten them up a bit for him.) Once the bat is dried black take 2 pieces of black felt and cut the ears out. Attach the felt ears to toothpicks and insert. Do the same with the Bat wings. Use a skewer to attach the back of the wings to keep them straight. I used black electrical tape to tape the toothpicks and skewers on the felt. And then stick them into the pumpkin. Super Easy and Super fun for kids!
The Ghost Gourd is made from a Birdhouse Gourd grown in my moms garden. She made this with Brother Baer while I was in the hospital recovering. It's so adorable!!!
She mixed orange and white paint to create this light orange color and then had Brother Baer paint it. She then allowed it to dry and helped Brother Baer paint the eyes on. Then just tied a ribbon around his neck to finish him off!
You could paint these completely white and have real ghosts too.


When things go bump in the Night!

Ouch!
So, around 4:00 AM this morning I was up to pee (Thank you four children) and on my way to the bathroom I checked on the kiddos. Babies were sleeping fine. Brother Baer was awake and "talking" in bed. I told him to go to sleep. He says, crying, that he had fell and smacked head head off his side table. I said..."It's fine go to sleep you shouldn't have been playing around anyways" and continued on my way....
Imagine my *Bad mom* moment this morning when I awake to this....Poor Brother Baer really did hurt himself and his mean, overtired mom told him to go to bed, he was fine. Talk about feeling guilty. I need to remember to always check out a bump in the night and to not assume that the kiddos are making up stuff for attention in the middle of the night. *sigh*

Saturday, October 29, 2011

Camping

Camping - Baer Style
My life has been a bit on the crazy side this week (OK crazier than usual) I had surgery and was in the hospital and now I'm "man down" I can't lift my kids or lift anything. I am basically useless. LOL And at the mercy of everyone else. Which, being the *crazy control freak* Super mom I am is really really hard.
I hate this. But one of the fun things that came from the week is Papa Baer camping with the kids. Family fun night was just them with me watching this time.
Papa Baer moved the furniture and built tents in the living room. Gathered flashlights and a camping latern and they all played in the tents. Baby Baer and Little Baer of course loved it and had a blast. Brother Baer enjoyed himself too as he chased the babies in and out and around and around.
Brother Baer is all about "Family Fun nights" these days and can't wait to have them. The simple things like building a tent and camping in the living room are things that memories are made of.
So, as I sat here watching them enjoying the camping fun I remember what amazing little kiddos I have. And how much they love their daddy and their papa Baer time. They don't need lots of toys and expensive presents. Just time...And it's so fun to watch them grow and learn all the fun things they do when you sit and enjoy the fun.
And sometimes, when you let go and let others decide the fun things to do you move furniture around and do silly things. And that's totally awesome in my book! maybe I should relax and let go more often.

Saturday, October 22, 2011

Trunk or Treat Castle Theme

Trunk or Treat Castle Theme!
For Halloween this year we did a Fairy Tale Land Theme. Complete with the Castle for Trunk or Treat. If you want to know how to create the Knight, Princess and Dragon costumes check out the other blog posts!
This will tell you how to create your "Castle" design for the back or your SUV, mini van, truck or even a trunk.
This was super easy and literally cost less than $10.00 to create! (Could be less!!!)
I took a trifold Cardboard display (one you
would use for a science project. Now I had
this at home so I spent nothing. You could
use cardboard to reduce the cost as well. But
this cost about $8.00 when bought new!)
I cut the top with a box cutter to the shape I wanted. You could go fancy, I didn't. Just simple castle shapes. I also cut the door on the top and both sides but left the bottom in tact for the draw birdge) then I spray painted the whole thing with silver paint. Once dry I used a marker to draw on the stone. I bought 3 ft of light chain. ($3.58 total) and attached the chains on both sides of the draw bridge. I used wooden skewers and attached red felt to the tops as the flags and stuck them into the cardboard at the top! The great thing about the trifold is that it can be adjusted with the actual size of your "trunk" and there was no need to measure. If you have only cardboard I would just measure the space you need it to fill and then cut from there!!!
I attached the chains with some hardware I stole from papa Baer's work bench (shhh!!!!) and it worked perfectly!
Here is everyone together ready to go!!!!
I did put the candy inside the Castle and the kids
could reach into the draw bridge to retrieve their candy!
With a super small budget and a desire to make a big impact I designed and created the 3 costumes and the Castle for the Trunk for less than $50.00 for EVERYTHING!!!!

Homemade No Sew Princess Costume

Homemade No Sew Princess Costume

So to finish out the 3 Baers costumes this year little Miss Baby Baer was transformed into a Princess. this costume was completely no sew. BUT....I must say I did not make the tu-tu. I had a tu-tu that someone had given me for her and we just used the tu-tu and created the colors and costume around that. Tu-Tu's are big these days so I figure a lot of people have them already. If so use it! And create the costume colors around the tu-tu.
I have no idea how to make a tu-tu so I can't say if you have to sew it or not. LOL (Just an fyi)
Supplies needed:
Scrapbook paper (glittered style)
1/2 yard tulle
jewel embellishments
glitter glue
foam craft wands
foam stickers
I got the foam stickers, ribbon, jewels and scrapbook paper all at Walmart in the clearance section. The Foam wands at the dollar tree. The entire cost of this costume was $10.00!!!! (Spending $3.00 on the tulle)
I created the hat by rolling a piece of the scrapbook paper into a tube and sizing it to her head. Leaving a small hole at the top to thread the tulle into. Once it was sized correctly I just stapled it together (The staples will be covered) and decorated with the jewel embellishments and foam stickers. I cut the tulle in half and threaded the tulle into the top of the hat and secrured it to the inside with *packing tape* (shhh....) and then made 2 slits on either side of the hat and threaded a long ribbon that went through and out the other side to secure it to her head (Tied under her chin)
She modeled the hat for me!!!!!
I then just decorated the foam wand with the
jewel embellishments with glitter glue and the
foam stickers.
Super Super Easy! I had ideas of different shirts but the freezing cold temps of PA in October changed my plans. I just put a turtleneck under a onsie that said Little Princess. And then double layered a pair of purple tights under a pair of pink tights. And her costume was totally done!!!!
Check out the other Blog posts for the rest of the fairy tale land and the castle to finish off the trunk or treat theme!!!

Homemade No Sew Dragon Costume


Homemade No Sew Dragon Costume
Along the Fairy Tale Line (see other Blog posts for the Knight, Princess and Castle) Little Baer was a Fierce Dragon!
although he didn't look very Fierce he sure was adorable!
This Costume was really super easy and can be made literally in an afternoon! With no sewing and for less than $15.00
Supplies:
Black Hooded Sweatshirt with Zipper
Felt in desired colors (I choose purple and green)
Spray adhesive
Fabric Glue
Cardboard
Wings (I bought a bat at the dollar tree)
I glued the wings to the back of the sweatshirt (I actually had to remove the "bat" body from the wings with wire cutters.
Then I used felt pieces to cut the spikes to go down the back of the costume. I cut 2 pieces and glued them together at the spikes leaving enough space at the bottom to "open" the 2 pieces to then glue them to the sweathirt. Once the spikes were glued to the back and top of head I used the spray adhesive to stiffen them and make them stand up better. to have them flow down the head of the sweatshirt you will need to cut the felt in different spots to create more of a "bowl" the easiest thing to do is to actually place the hood of the sweatshirt over top of an upside down bowl to form as a head would be.
Cut your scaled out of felt. You will need A LOT.
you will want enough scales to cover the front of the sweatshirt, down the back (to cover the felt where you glued it) and the tail completely. So I decided on triangle scales. But half circle ones would be great as well!
Once you cut them cut out just glue them onto the sweatshirt. remember to place something in between the fabric so you aren't glueing the fabric together.
Once the front is dry you can do the back!
I covered the green spikes with purple scales down each side. and over the wings. Once all the scales are glued I sprayed a layer of spray adhesive over top of the entire thing! then let dry as you construct the tail.
To construct the tail I cut from cardboard the shape and length I wanted. Then simply covered it with scales using the same technique. I used the same spikes for the top of the tail as I did down the back. And I left about 4 inches of felt at the top of the cardboard so that I could attach to his body. I'm telling you fabric glue is my friend!!! I then spray it with the spray adhesive as well. Once the tail is dry I simply cut a few holes about 4 inches from the top of the tail (In the extra fabric you left) and then feed thick ribbon through and tie around the waist underneath the costume.
I then just put black pants on him and he was DONE!
Super easy and super cheap to add to our fairy tale!!
See the other blog posts for the entire Fairy Tale Collection! Totally New Sew and totally Frugal! (I don't wanna be cheap... LOL)

Homemade No Sew Knight Costume

Homemade No Sew Knight Costume
This year I decided to create a fairy tale land with the kids for Trunk or Treat.
First I made Brother Baer into an awesome Brave Knight. totally no sew! (As I don't sew. lol) Little Baer became a Fierce Dragon and Baby Baer was transformed into a beautiful princess. (Although she's a princess everyday I think)
The SUV was transformed into the Castle of the land.
This post will explain how to create the Knight Costume. For the others check out other posts.
Supplies Needed:
Cardboard box
1 yard Fleece (I choose red)
1 tee shirt in matching color (craft section for $3.99)
Self Adhering Foam pieces in matching colors
Felt in matching colors
Glitter Glue (silver)
Silver Spray Paint
2 foot of rope
Jewel Embellishments
helmet and arm protectors (bought at dollar tree)
Feather
1 yard of silver metallic material (armor on neck)
duct tape
I started by created our "crest" The family crest will follow throughout. I decided on a cross. I cut the crests out of foam board and felt (Felt for the cape, foam board for the tunic and the sheild) I embellished each crest with glitter glue and jewels. (Bought at dollar tree)
The crests for the cloak was done and allowed to dry prior to glueing them to the cloak.
I used a large crest for the back of cloak. And 2 smaller crests for the front of the cloak (on each side) one small crest for the sword and one large crest for the sheild. And finally a large crest for the tunic (red shirt)
Make sure while glueing everything into place you place a piece of cardboard in between the shirt so the fabric doesn't glue together!
While the crests are drying you can work on cutting the sheild and sword out of the cardboard. I used a box and just drew the sheild and sword out freehanded and then cut it out with a box cutter. Then you can spray paint the pieces with the silver paint. It took 2 layers of spray paint and of course make sure you paint both sides!
Everything can dry at the same time! While you work on your cloak!
To finish off the sheild and sword I used duct tape to wrap the handle of the sword and used duct tape to create a handle on the back of the sheild. If you tape a few pieces of duct tape together (sticky side to sticky side) you can have a strip to tape onto the back side of sheild and can be used as a handle. Just leave enough loose to hang onto with your hands.
The duct tape around the sword handle just finishes it off.
To create the cloak I used the one yard of fleece
and rounded the egdes off to create a more cape
/cloak effect on the top. I left the bottom straight. I also made a vee shape at the top
of the fleece in the center. Once it is cut to shape you can fold down and glue the upper edge. Leaving a "rod space" as to thread the rope through. The vee in the center will allow you to have an opening so that when you feed the rope through you have a half way point to grab and continue feeding. Once the top is dry feed the rope through and then glue your crests on.
I purchased the helmet and arm armor from the dollar store and then just added the red feather on the top of the helmet.
And it's done! add a pair of black pants to the costume and you have a really awesome homemade, no sew costume for LESS than $20.00 and 1 (or 2) days of work!!!!!!

Thursday, October 20, 2011

Don't Give Up on Him

So, as everyone knows Brother Baer has Autism, and with Autism comes a host of issues that are just sometimes to much for anyone to handle. I get he's hard....Really I do. But here is what I would like to write to the school system who has continually pushed him aside:
Dear School District,
I know my son is a tough cookie. But he's not bad. He has Autism. There's a HUGE difference. And being a child with autism he needs stability and structure more than anything. So throwing him away when he gets to be too much isn't something I feel you should be allowed to do. I know it's hard, trust me.
When you tell me how he bolts from you and you had to chase him down the hallway, I tell you how I have to chase him down the parking lot while pushing a buggy full of babies and groceries.
When you tell me he head butted his aid in the jaw and she had to go to the hospital, I tell you that I get head butted, kicked, hit, and punched on a daily basis.
When you tell me that you worry about the safety of other children and staff, I tell you I worry about my safety and my babies safety.
When you tell me you need help, I tell you SO DO I. I have stood in front of doctors and cried for someone, anyone, to help me help him. I have been to every kind of therapy and every kind of doctor you can imagine.
When you tell me ANYTHING....ANYTHING....I have already seen it. Already lived it. And already knew how awful it is.
But, he can't control himself. This is where you come in. The professionals. The therapists. The Doctors and those who have swore to Never leave a Child Behind. No child Left Behind should include every child. Every single child. Regardless of their cuteness or ability.
I am just a mom. A Mom that only wants the absolute best for my son. The same as I want the best for my others. I know he isn't as "lovable" as my son with Down Syndrome. Brother Baer is kind of like hugging a rock. He doesn't have that shining light in his eyes to make you warm and fuzzy. I get that. But, he's a good boy. A loving and caring brother. He's honest to a fault, he's smart and will be something someday. As long as YOU don't give up on him.
I don't have the choice to say...here you take him he's to hard for me. and I don't think it's fair that you can. He deserves to be valued. To be granted the same love, understanding and dedication that you wanted to give to children when you became a teacher.
And most importantly. He deserves to have someone. Hopefully a team of someones...that will say....No Matter What. No Matter How Hard. I will not give up on you. Because you are worthy. You are God's child. And that makes you worthy of my love and commitment.
Please consider that when deciding to throw him off to someone else again.

Tuesday, October 11, 2011

It's all fun and games till....

Baseball is over for the fall. Brother Baer got his trophy and had a blast! So what to do now...
Well Here we are. Brother Baer is joining the pack! WOOT WOOT! He is officially a boy scout. A Tiger Cub Scout to be exact. And it was super fun going to the first meeting and finding out all the fun stuff they do......until...
I have to shell out $65.00 to join. And now have to shell out another $70.00 for a uniform. (That he will only use most of for 1 year.)
Then we are given the popcorn papers to sell. And that stuff is NOT CHEAP. Not at all.
Then we are given his first badge work. The bobcat. WOOHOO!!! This is fun I think. Badge work. Oh but wait....I have to work on having him memorize and learn all these rules and secrets and hand shales and salutes. *sigh*
And then I read more...
I have to sew. Sew those patches and badges and council numbers on the shirt. AND to top that off there are actual measurements to follow....4 inches from the top here....blah blah blah. Really? Don't they know I don't sew. UGH.
Trunk or Treat should be fun though. Except now I have to finish all 3 costumes 11 days earlier then I planned. AND figure out how to decorate the car. (Because this is apparently something we must do to be cool) and get candy. And all this other stuff.
So now I have signed myself up for massive amounts of work that I really didn't need and Brother Baer can't even do. It's like my job....So here I am. Signed up and ready to be a Boy Scout. Just what I always wanted.
They are only young once right? :) ACK!

Monday, October 10, 2011

It's all about me!

Why I blog?
So I am not the best blogger out there. I don't really have a message of importance to get out. I don't really offer anything creative or important. So Some people wonder...Why blog? So here's the answer.
It's all about me. :)
Yup that's it. it's all about me. I spend my days (and nights) handling everything for everybody. I talk about therapy and IEP's and poop and vomit for every living creature in my home. I manage everyone's problems and fix them if I can. I am the finder of Stuff. The doer of the work. I am the driver and scheduler. I listen to people tell me their problems when they call to chat. I "care" about what they say. No one actually wants to hear what I say. No one actually cares to listen. I mean, not in a bad way....But telling your 6 year old about what's happening in your world is pretty much...useless. As he doesn't care. And the babies care even less.
So...I Blog. I Blog so I can talk about myself. All the time. I can talk about the subject I want to talk about. Without being interrupted and the subject changed into something THEY want to talk about. Or if I complain here that my back hurts....The Blog God's don't announce their back hurts WORSE. If I'm depressed....The Blog God's don't tell me well THEY are seriously depressed and want to die. If I say I need help the Blog God's don't say....I need MORE help.
So there. I said it. It's all about me. It's all about me. It's all about me.
Well.....It's about me in my made up fairy tale world known as Blogging. Here in Real life it's not ever about me. so, indulge me my Blogger Friends. And Blog God's. Indulge me and let me pretend that it's all about me. :0)

How does this happen??

How does this happen?
I lost a shirt. A SHIRT. Not a sock...a Shirt in the laundry. How does this happen? I got a new CHD Awareness Shirt 10 days ago. I wore it ONCE. Took it off when I took a shower and put all my clothes from there to the laundry....And it hasn't been seen since. W....T.....F........
I have done all the laundry, a few times, I have checked everyone's closets and drawers...Just in Case There was some silly reason I would put my shirt in baby Baer's drawer.....But nothing.
What makes this worse is that I am the ONLY one to do laundry. I don't have a laundry fairy, no one in the house actually does laundry but me....How can I loose a shirt? How does that happen?
I guess I could buy a new one. And forget about it. But honestly I can't stop thinking about this stupid shirt. I want to wear the shirt, but more importantly I want to know what the heck happened to this shirt. How does one loose a shirt in the wash.
UUUGGGGHHHHHH!!!!!!!!